Mounting Volumes
This page describes my second exercise with Kubernetes. After completing the first exercise, I wanted to learn how to mount folders to persist data for containers running in pods.
Demo application
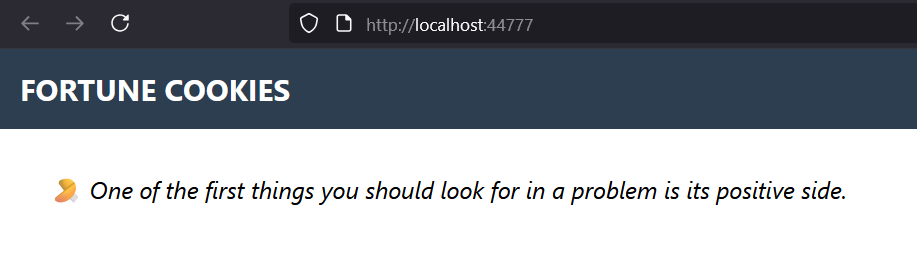
Since I needed a demo application to test volume mounting, I decided to create a web
application that returns fortune cookies read from a
SQLite database. The application expects a SQLite
database in the ./store/ folder relative to the application's root (its Current
Working Directory (CWD)), and its homepage displays a random fortune cookie each time
it is refreshed. The screenshot below shows the homepage of the application:
The source code of the application is on GitHub at: RobertoPrevato/SQLiteWebDemo.
The repository includes a Dockerfile to build a Docker image, and a GitHub Workflow
to build and push the image to Docker Hub.
The Docker image can be pulled from Docker Hub with the following command:
Demo SQLite database.
The SQLite database expected by the application can be created using Alembic, using the script
newdb.sh included in the repository. A copy of the database file is also included in ./examples/02-mounting-volumes/data/app.db, so you can use it directly.
Mounting volumes with Kind
Since I am still practicing with kind, I realized I needed to configure my kind cluster to mount a folder from my host machine to the containers running in the cluster.
I decided to create a folder in my tmp directory, named "stores", planning to
create a subfolder for each application I want to run in the cluster. In this
case, I created a cookies subfolder to store the SQLite database for the
fortune cookies application:
Create a /home/stores folder on your host machine, including the cookies
subfolder, and make it writable:
I asked GitHub Copilot's help to configure volume mounting in my kind cluster, and it suggested the correct configuration to mount the host folder to the container running in the cluster. I added the lines highlighted below to the kind configuration file I created previously (kind.yaml):
This configuration mounts the host folder /home/stores to the control-plane's
node container at the path /home/stores. I made this planning to later mount specific
subfolders into containers for specific pods.
Recreating the cluster
This command will delete the existing cluster and create a new one using the updated configuration file. The new cluster will have the host folder mounted as specified.
Deploying the application
For this exercise, use the files in the examples/02-mounting-volumes/ folder.
Repeating the steps from the first exercise, I created the necessary ingress controller:
kubectl apply -f https://kind.sigs.k8s.io/examples/ingress/deploy-ingress-nginx.yaml

kubectl wait --namespace ingress-nginx \
  --for=condition=ready pod \
  --selector=app.kubernetes.io/component=controller \
  --timeout=90s
Then, I created the namespace for the application and deployed the fortune cookies application. Note the section to configure the mount point for the SQLite database:
I created the application deployment and service with the following command:
Finally, I created a namespace for the common ingress and applied the ingress rules to direct traffic to the application, including the self-signed TLS certificate like described in the first exercise.
Remember to generate the self-signed TLS certificate and key files, and place them in the
ssl/ folder in the examples/02-mounting-volumes/ directory. Then, run the
following commands to create the TLS secret and apply the ingress rules:
kubectl create namespace common-ingress

cd ssl
kubectl create secret tls neoteroi-xyz-tls \
  --cert=neoteroi-xyz-tls.crt \
  --key=neoteroi-xyz-tls.key \
  -n common-ingress

cd ../
kubectl apply -n common-ingress -f common-ingress.yaml
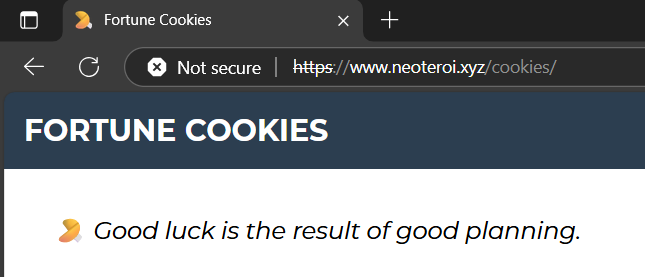
Hurray!
The application is now running in the cluster, and you can access it using the following URL: https://neoteroi.xyz/cookies/.
Using SQLite for web applications.
SQLite can be successfully used for smaller to medium-sized web applications (which is to say, most websites). SQLite is a popular option for many websites and applications due to its simplicity, ease of use, and lack of a separate server process.
SQLite is designed for situations where a single process (or a single instance of an application) writes to the database, but multiple processes or instances can safely read from it at the same time.
There are some limitations to be aware of:
- Reads: Multiple instances can read from the same SQLite database file concurrently without issues.
- Writes: Only one instance should write to the database at a time. SQLite uses file locks to prevent simultaneous writes, but this can lead to contention and performance problems if multiple writers are present.
For web applications running in Kubernetes, it's best to use SQLite only if you have a single application instance writing to the database, or if your workload is read-heavy and you can ensure only one writer. For multiple writers, a client-server database like PostgreSQL is a better choice.
There are attempts at creating strategies to allow distributed versions of SQLite, to overcome the limitations of concurrent writes, like LiteFS.
I could have used any other example to learn volume mounting in Kubernetes, but I
decided to use SQLite because I am interested in using this database for some of my
projects.
Note about volumes
Using hostPath is only suitable for local development. For production, it is best using a PersistentVolume instead.
For a tutorial on how to use PersistentVolume, see Kubernetes - Configure a Pod to Use a PersistentVolume for Storage.
Kubernetes supports many kinds of volumes!
A volume created with hostPath mounts a directory from the Kubernetes node's
local filesystem into a pod.
hostPath volumes:
- Data is stored directly on the node’s disk at the specified path.
- If the pod is rescheduled to another node, the data does not follow; it only exists on the original node.
- Not suitable for multi-node clusters or production, as it ties data to a specific node.
PersistentVolume (PV) volumes:
- Abstract storage and can use networked storage (NFS, cloud disks, etc.).
- Data persists independently of pods and nodes.
- Pods can be rescheduled to any node and still access the same data via the PV.
- Suitable for production and multi-node clusters.
Summary: hostPath is for local, node-specific storage; PersistentVolume is for
portable, cluster-wide persistent storage.
Next steps
Following a system restart, when I didn't have an internet connection, my application
stopped working because Kubernetes could not pull the Docker image
robertoprevato/fortunecookies:latest from Docker Hub.
My next exercise describes an interesting subject: what I did to avoid that problem, it's about Loading Docker Images in Kind.
Last modified on: 2025-08-09 12:46:51